Monday, March 7, 2011

Butterfly Bridal Shower


I had the honor of putting together one of my closest friend's bridal shower together this weekend. I was excited to be able to choose the theme and everything.

I knew I wanted something with butterflies and the color purple since that is her wedding theme. I went to one of my favorite sites for inspiration: etsy. I truly admire the talent so many people have on that site. In my search for all things butterflies and purple, I came across the Frog Prince Paperie. Paula, of the Frog Prince Paperie was so kind and personalized what was originally a birthday party idea into a bridal shower theme for me. Here's how the party turned out...


The decor/theme: butterflies, purple with green accents. I loved Paula's simple butterfly theme. She made water bottle labels, cupcake topper (I couldn't find the right size scalloped punch to make them as pretty as I wanted); bag labels; and banner (and more but I just didn't have time to use all the materials she created). The guests loved the personal touches it added to the party :)


The main table: I was excited the bride's mom had an area to set up the cupcake tower and cookie favors (made by the bride's mom too). I hung up the banner over it - looking back, maybe I should have hung the banner over the mirror, but ah well. I also added some flowers on each side.


The food table: Thanks to the lovely bridesmaids who helped put together the main food which included brie with hot pepper jam, spanikopita, mini quiche, hummus and veggies, fruit and more. I love the center piece I came up with the day of - green and purple vases .99 cents each at the thrift store; the L and B initials $1.00 each at Michael's; LOVE sign the bride's mom already had; flowers from the local grocery store for around $20 total. Not bad!


Desserts I made: As you know from my blog I love dessert :) I made lemon blackberry cupcakes, coconut macaroons and white chocolate dipped oreos. The cupcakes made a great center piece on the main table.

I was so happy with the final result! This was only the second party I've gotten to really put together. There was a lot more detail I wanted to add, but time constraints (grad school, work, etc.) but I'm happy with what we ended up with. I'm ready to start planning the next party! Thanks to the bridesmaids for all the help; to the bride's mom for letting us use her house and making the sugar cookie favors; and the Frog Prince Paperie for the designs.
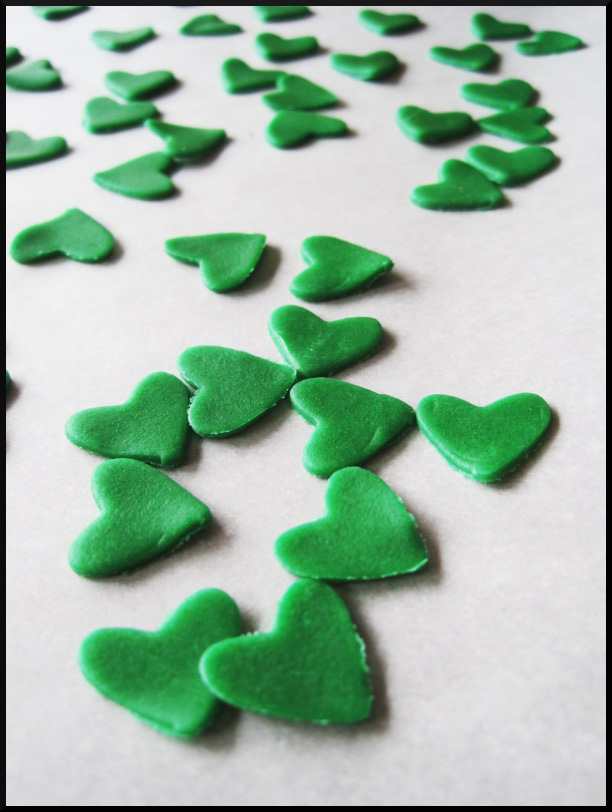
Monday, February 28, 2011

Lucky Monkey Baby Shower

This past weekend I made cupcakes for a shamrock/monkey theme baby shower. The family is Irish (hence the shamrocks) and for the monkeys they wanted the Fisher Price Rainforest monkey. I did my best interpretation of the monkey I could ;-) Cupcake flavors included lemon and Oreo mint.

Since I had extra cupcakes, I made some different flavor combos to bring to my friend's bachelorette party that night. Flavors included lemon or chocolate cake with raspberry swiss meringue buttercream with a Chambord raspberry filling. Kinda funny - I bought the jam at the dutch market and mixed alcohol in it ;-)


I also made a coffee swiss meringue buttercream to top off some of the chocolate cupcakes. I looove the coffee swiss meringue, it reminds me of coffee ice cream and pairs so well with chocolate cake.

The ladies loved them, I mean... Who doesn't love cupcakes after a few drinks?? ;-)

Saturday, February 19, 2011

Lemon Blackberry Cupcakes

It's been awhile since my last post! School and work have consumed my life. Haven't been able to bake as much as I've liked. I didn't even get to make something cute for a valentine's day post :( Ah well... I made these cupcakes last weekend for a friend's birthday. Blackberries were on sale and I've been wanting to make some lemon cupcakes. A great flavor combo - reminds me that spring is around the corner!

Recipes Used:

Martha Stewart's Swiss Meringue Buttercream
-I cut this recipe in 1/2 and added a few tablespoons fresh blackberry puree (be sure to remove the seeds! I use either a mesh strainer or a cheesecloth) instead of using vanilla
-It makes a beautiful all natural purple color that I just love

Joy of Baking Yellow Cupcakes
-I added fresh lemon zest and lemon juice to the batter
-This recipe is best when eaten the same day, if not as soon as its cooled. I think I would use another yellow/vanilla cake recipe instead next time because they were a bit dry at the time of the party that night (but still tasty ;-)

Almost forgot... I got to use my logo stickers! I look so professional huh?? ;-) ~Cara Lee

Sunday, February 6, 2011

Super Bowl XLV Cupcakes


I made some Super Bowl cupcakes for the big game today. I came up with a "Pretzels and Beer" cupcake. How I came up with this concoction:

Pretzels + Chocolate = Flipz
Pretzels + Beer = A delicious food combination
Chocolate + Beer = Young's Chocolate Stout
Pretzels + Chocolate + Beer = CUPCAKE!


The result: a cupcake with a pretzel crust, chocolate stout cake, a little vanilla swiss meringue frosting, and topped with a chocolate covered pretzel.


I could care less for the teams who were in the game (I'm and Eagles fan myself ;-) but I did match the colors black liners with yellow sprinkles for the Steelers and then yellow liner with green sprinkles for the Packers.


Recipes I used

Crust: I just winged it... smashed up some pretzels, sprinkled some sugar and some melted butter

For the cake: Smitten Kitchen's Chocolate Whiskey and Beer Cake (just the cake part, and I used Young's Chocolate Stout instead of Guinness)

Frosting: Martha Stewart's Swiss Meringue

Thursday, February 3, 2011

Valentine's Birthday


A friend of mine asked me to make some cupcakes for his girlfriend's birthday. He let me do anything I wanted, except the flavor had to be red velvet - her fave ;-) Since Valentine's Day is around the corner I used that as inspiration.


Even though I cannot stand the taste of those conversation hearts, I do think they are fun to look at. I made fondant conversation hearts and I thought it would be a cute idea to write things on each heart that had to do with them as a couple.
Some phrases I used: "family" (since they are expecting), "farmville" (she loves that game), to really personalize it. I also put fun fondant curly ribbon on some of the cakes to make it more birthday-ish :)


So I had some left over red velvet batter and wanted to create something... I came up with a "red bottom" cupcake.


It's red velvet and cheesecake cupcake with chocolate chips. Traditionally you use a chocolate cake on the bottom. I attempted to make the cheesecake part look like a heart ...FAIL! But it tasted good. You don't even need frosting. You know I've met quite a few people who ... dare I say this....don't care for frosting!
(My BF included... but I've been working on that ;-) ~Cara Lee

Tuesday, February 1, 2011

Giveaway Winner!

Happy February. Thanks to all who entered the giveaway this past week. Congrats to Rene of Rene Takes the Cake! She left the 3rd comment and she is the Winner of the CSN Stores giveaway. She won $35 to any of their online stores! Thanks again to everyone :)

Friday, January 28, 2011

Snow Day


We had our first 2011 snow storm here in the DC area this past Wednesday. It was kinda crazy - not as bad as the blizzard last year, but people got stuck on the roads for hours and power is still out for many in the area :( Luckily we had power and I am ever so grateful.

Of course I was snowed in and itching to bake something. But what? All week there were these store bought cinnamon rolls on the counter. I try to never eat that stuff. My motivation for staying away? Just look at the label:


I can't even read half the ingredients names. 15 grams of fat in only half a roll?! Holey moley! So I decided to make my own rolls. I made the dough, let it rise once and formed the rolls before I went to bed so they would be ready to pop in the oven in the morning. Here's the recipe I used with my modifications in red.


Overnight Cinnamon Rolls
Modified from All Recipes

Ingredients
  • 1 cup milk
  • 1/3 cup butter
  • 1 (.25 ounce) package active dry yeast
  • 1/2 cup white sugar
  • 4 1/2 cups all-purpose flour
  • 1 teaspoon salt
  • 3 eggs
Filling
  • 3/4 cup brown sugar
  • 1 tablespoon ground cinnamon
  • 1 cup chopped pecans
  • Melted butter
Directions
  1. Heat the milk in a small saucepan until it bubbles, then remove from heat. Add the butter and stir until melted; let cool until lukewarm.
  2. In a large mixing bowl, dissolve the yeast in the milk mixture. Add the sugar, 3 cups of flour, salt and eggs; stir well to combine with paddle attachment. Then switch to the dough hook and Add the remaining flour, 1/2 cup at a time, stirring well after each addition. When the dough has pulled together, turn it out onto a lightly floured surface and knead until smooth and supple, about 8 minutes.
  3. Lightly oil a large mixing bowl, place the dough in the bowl and turn to coat with oil. Cover with a damp cloth and let rise in a warm place until doubled in volume, about 1 hour. (My house is pretty cool and dry since it's the winter time. Since I have a gas oven I turned it to 170 degrees and placed the dough in the bowl on top of the stove to create a warm/humid environment to rise. I think my house was still too cool so I let it sit a little longer and it finally began to rise.)
  4. Deflate the dough and turn it out onto a lightly floured surface and roll into a 10x 14 inch rectangle. Lightly brush the far edge with water. In a small bowl combine the cinnamon and 3/4 cup brown sugar and sprinkle over the rectangles. (I divided my dough into four sections and rolled it out separately. So much easier to deal with smaller rolls! This way you can also do some without the nuts for those who do not like them. Combine brown sugar and cinnamon. After you roll the dough into a rectangle, brush with melted butter then sprinkle the brown sugar and cinnamon then sprinkle with nuts.)
  5. Cut the dough into 12 equal pieces; place the pieces in a greased 9x13 inch baking pan, or 12 inch deep dish pizza pan. Cover with plastic wrap and place in the refrigerator to rise overnight. (Since I had 4 smaller rolls, I cut them each about an inch and a half thick and placed them in muffin tins. I got about 24 rolls. Since the house was cool I left them out to rise overnight on the counter).
  6. The next morning, preheat oven to 375 degrees F (190 degrees C). Take the rolls out of the refrigerator and let stand at room temperature for 30 minutes. (Since I left them on the counter I did not have to wait for them to come to room temp.)
  7. Bake the rolls for 25 to 30 minutes or until golden. (Since I used the muffin tins, I only had to bake them for 15-18 minutes. If you use the tin, be careful NOT to over bake. Also may want to put the pans on top of a cookie sheet because some of the filling dripped over when I baked them in the tins.)
  8. Top with your favorite cream cheese frosting or glaze.

These were so yummy! Baking them in the tins make them a little more crustier, so like I said be careful not to over bake (I did that to a few by accident). I think these have become a snow day tradition - I made them during the blizzard last year too. I say calories don't count when it snows! ;-) ~Cara Lee

PS - 4 more days to enter the GIVEAWAY (just a reminder ;-)

Wednesday, January 26, 2011

baking is my therapy

I was feeling a little blue the other day... schools about to start up again, its cold, and sometimes ya just get bummed out. For some, it's retail* therapy that makes them feel better but for me, it's baking. It always makes me feel happy and accomplished (well... as long as the recipe turns out ;-) .

(*For those of you who prefer retail therapy, check out my giveaway this week!)

So I decided to make cookies. But what kind? Yes, my favorite is oatmeal chocolate chip, but I wanted to try something different. I've been wanting to try making these cookies from Momofuku Milk Bar in New York. I've heard about this place on blogs and on the food channel and what not. So I found the recipe for "copycat" cornflake, marshmallow and chocolate chip cookies at The Cookbook Chronicles that I decided to try out. As you know I love oatmeal chocolate chip cookies and these cookies have some of those ingredients so I was sold.


Copycat Momofuku Cornflake Marshmallow cookies
Makes 20 cookies
The Cookbook Chronicles


2 sticks unsalted butter at room temperature
1 ¼ cup packed dark brown sugar
1/3 cup granulated sugar
2 eggs
2 tsp vanilla extract
1 3/4 cups all-purpose flour
1 tsp baking soda
1/2 tsp baking powder
1 ½ tsp kosher salt (plus more for sprinkling)
3/4 cup oatmeal
1 1/4 cup lightly crushed cornflakes (= about 1 1/2 cup cornflakes before crushing)
2/3 cup mini chocolate chips*
about 3/4 cup mini marshmallows

*The chocolate chips in the original Momofuku Milk bar cookie are minis, though substitute with regular-sized chips if you prefer

Preheat the oven to 350 degrees. In a mixing bowl, beat together the butter, brown sugar, and granulated sugar until light and fluffy, about 2-3 minutes on medium speed. Add the eggs and vanilla extract, and beat until combined.

Add the flour, baking soda, and salt and beat on low speed, just so the dry ingredients become incorporated. With a wooden spoon, mix in the oatmeal, crushed cornflakes, and chocolate chips.

(If you have time and would like the cookies to spread a little less, refrigerate the dough for two hours.)

On a parchment-lined baking sheet, scoop up and roll the dough into golf ball-sized spheres. (Six will fit comfortably on one pan–give them room to spread!) Lightly press down 4 mini marshmallows in the center of each ball of dough. Sprinkle tops with a touch more salt. Repeat with the remaining dough.

Be sure to leave enough space on the cookie sheet !

Bake for 9-10 minutes. The cookies will still look soft in the middle when you take them out of the oven. Allow them to cool directly on the tray for a few minutes before moving them onto a platter.

How cute are those plates?!

Outcome: I did the recipe exactly as followed ( as well as putting them in the fridge, but only for about an hour). I watched them bake and they rose beautifully in the oven, but when they cooled they fell... so very flat. I did not let this discourage me because they tasted great and were still chewy (even the next day). BTW - I hate crunchy cookies! Soft please ;-) Maybe I will try to change up the baking soda/powder ration next time? Anyways, I really liked this recipe. I love the salty and sweet combo. I hope to try a real Momofuku cookie soon. Hey, you know what these cookies reminded me of? The Tony the Tiger Cookies my mom used to bake when I was a kid. Such good memories... I'm happy now :) ~Cara Lee


Tuesday, January 25, 2011

Giveaway!

I'm so excited to announce another giveaway!

The kind people at CSN Stores have
offered my lovely readers another chance to win a gift certificate to their stores.

Did you know CSN Stores has over 200 online stores where you can find anything you need whether it be swingsets, fitness equipment, or even cute cookware! CSN Stores is giving the winner of this giveaway $35 to their site! (BTW - I noticed the cutest aprons in the kitchen section ;-)

To enter the giveaway all you have to do is browse CSN stores website and leave a comment telling me what you would buy if you won. Please leave a valid email address as well.


More ways to enter:

-Become a fan/"like" of Cara Lee Cupcakes & Cake on Facebook and leave a separate comment that you are a fan/"like" me

-Become a follower of my blog on Google friend connect and leave a separate comment
-Blog/post about the giveaway and leave a separate comment and link to your post

This giveaway will end Monday night January 31st
at 11:59pm est. Winner will be randomly selected using random.org and announced Tuesday February 1st. (Which reminds me this could come in handy for that special Valentine!)
*Note* This gift certificate does not cover international fees.

Good luck!! ~Cara Lee

Sunday, January 23, 2011

I'm back! (plus an upcoming giveaway!)

I was MIA this past week because I took a nice relaxing vacay with the BF. Escaped the cold DC weather and headed to the U.S. Virgin Islands. We stayed on St. Thomas and visited St. John as well. A nice way to wrap up my winter break as graduate school starts up again this week :( Here's a little taste of my vacation.... I can't believe I'm back in the cold again! I will miss being able to bake whenever I wanted during my winter break from school. Though I will find time hopefully at least once a week or so during this spring semester ;-)

Giveaway:
I will be posting a giveaway this Tuesday!
So check back for details :)


~Cara Lee